How to Make Cones Ice Cream at Home (Crispy & Easy)
Nothing beats a crispy, golden Cones ice cream fresh from your own kitchen. Homemade cones have a wonderful buttery aroma and crunch that store-bought ones can’t match. Whether you’re pairing them with classic vanilla, chocolate fudge, or fruity sorbets, these cones are surprisingly simple to make. All you need is a few pantry ingredients and a hot pan (or waffle cone maker) and you’ll be enjoying sweet, crisp cones in no time!
Ingredients Breakdown for Cones Ice Cream

The secret to perfect homemade ice cream cones lies in the balance of sweetness, butter, and crispiness. Flour gives the cone structure, and sugar adds sweetness and color, while melted butter ensures that irresistible crunch. Egg whites keep the texture light and airy, while milk binds everything together into a smooth batter. A touch of vanilla adds warmth and aroma—just like a bakery-fresh waffle.
You will Enjoy This: How to Make the Perfect Pecan Almond Loaf Cake at Home
Equipment Needed for Cones Ice Cream

- Non-stick skillet, waffle cone maker, or griddle
- Mixing bowl & whisk
- Spatula or offset spatula
- Parchment paper
- Cone shaper (or make one with foil or cardboard)
- Measuring cups & spoons
- Cooling rack
Preparation of Cones Ice Cream

Start by gathering all ingredients and preheating your skillet or waffle cone maker. Prepare a smooth, lump-free batter by whisking together egg whites, sugar, butter, flour, vanilla, and milk. Set up a clean area with parchment paper and cone molds ready—once your cones cook, they must be shaped quickly while still hot and flexible.
Cooking Timetable of Cones Ice Cream

| Step | Time Needed | Details |
| Preparing the batter | 10 minutes | Mix ingredients until smooth |
| Heating the skillet or waffle iron | 2–3 minutes | Medium heat, evenly hot |
| Cooking each cone | 1–2 minutes per side | Golden brown and flexible |
| Shaping & cooling | 2–3 minutes | Roll while warm, cool till crisp |
| Total Time | 15–20 minutes | Makes 6–8 cones |
📌 Quick, simple, and ideal for weekend desserts.
Step-by-Step Instructions for Cones Ice Cream
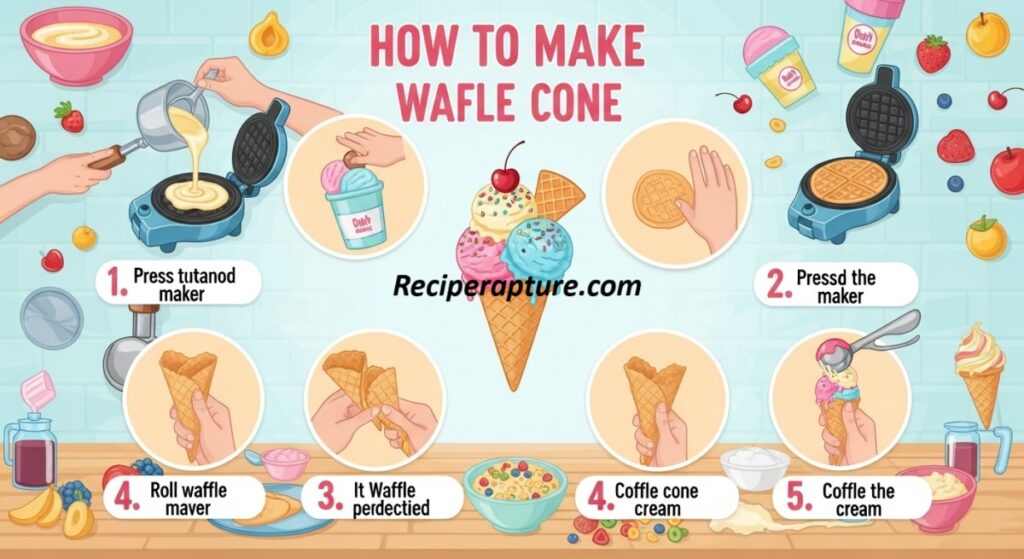
Whisk Ingredients: In a bowl, mix together 2 egg whites, ½ cup sugar, ¼ cup melted butter, ½ cup all-purpose flour, 2 tbsp milk, and ½ tsp vanilla extract. Whisk until smooth.
Heat Pan: Place a non-stick pan or waffle maker on medium heat. Lightly grease it with butter.
Pour Batter: Add 1½ tbsp of batter to the center and spread into a thin circle (about 5–6 inches).
Cook: Cook until edges turn golden brown (1–2 minutes), then flip and cook the other side briefly.
Shape the Cone: Quickly remove from the pan and roll around a cone mold while hot. Press the seam to seal.
Cool: Place on a cooling rack to set and become crispy. Repeat with remaining batter.
Optional: Dip the cone rim in melted chocolate and add sprinkles or crushed nuts for a fun twist!
Serving Suggestions for Cones Ice Cream

- Pair with classic vanilla, chocolate, or strawberry ice cream.
- Add whipped cream, chocolate drizzle, or caramel sauce for a deluxe treat.
- For kids, dip the rim in chocolate and decorate with sprinkles or crushed cookies.
- Store extras in an airtight jar to stay crisp for up to a week.
Comparison Table of Cones Ice Cream
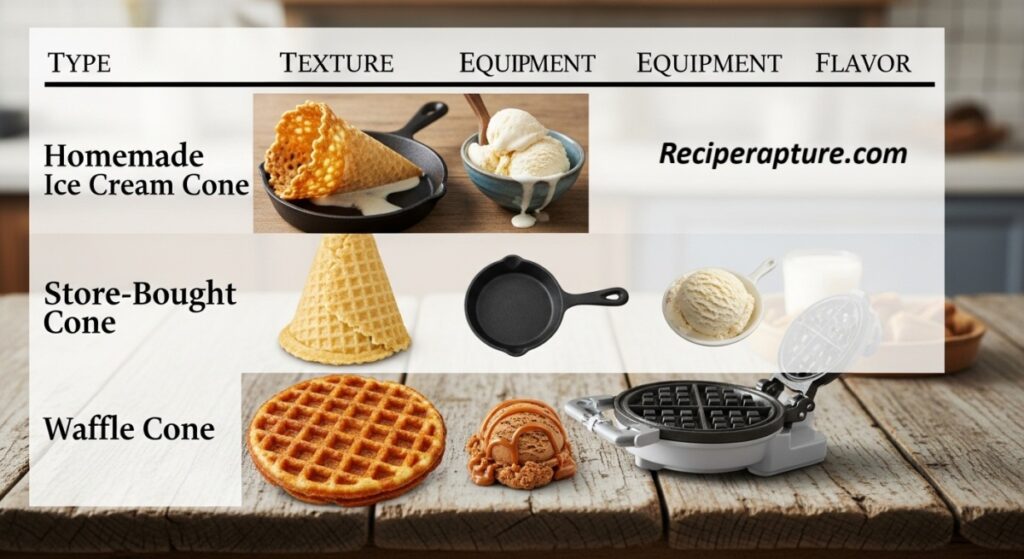
| Type | Texture | Equipment | Flavor |
| Homemade Ice Cream Cone | Crispy, buttery | Skillet or waffle maker | Fresh & rich |
| Store-Bought Cone | Crisp but dry | None | Neutral, less buttery |
| Waffle Cone | Crunchy, thicker | Waffle maker | Deep caramelized sweetness |
Tips & Variations
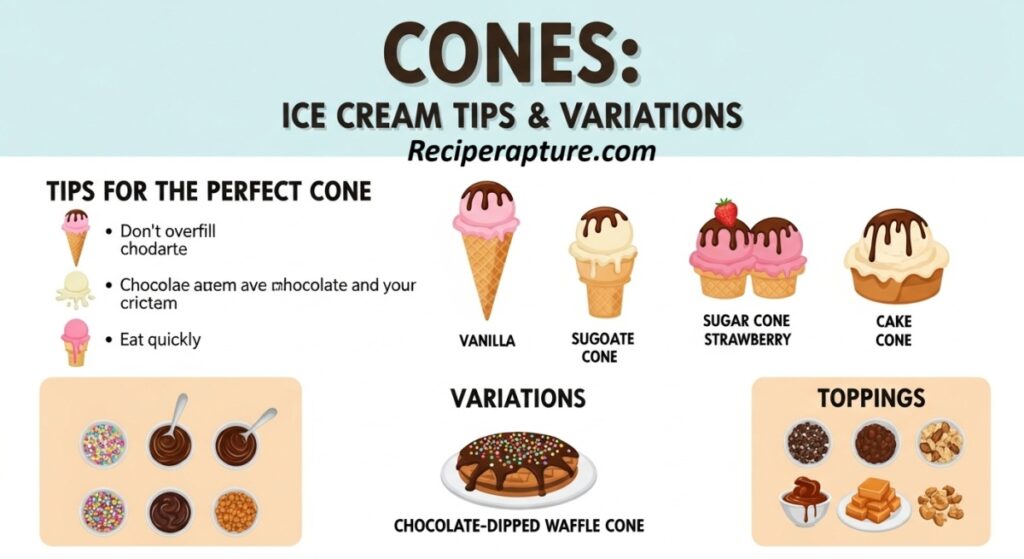
- Work fast—the cone must be rolled while hot or it will harden.
- Don’t overcook—too dark means bitter taste
- Add flavor twists: mix in cocoa powder, cinnamon, or lemon zest to the batter.
- No cone mold? Use a clean sheet of foil or parchment shaped into a cone.
- To make bowls instead of cones, drape hot discs over an inverted cup to form a bowl shape.
Ingredient Table for Ice Cream Cones
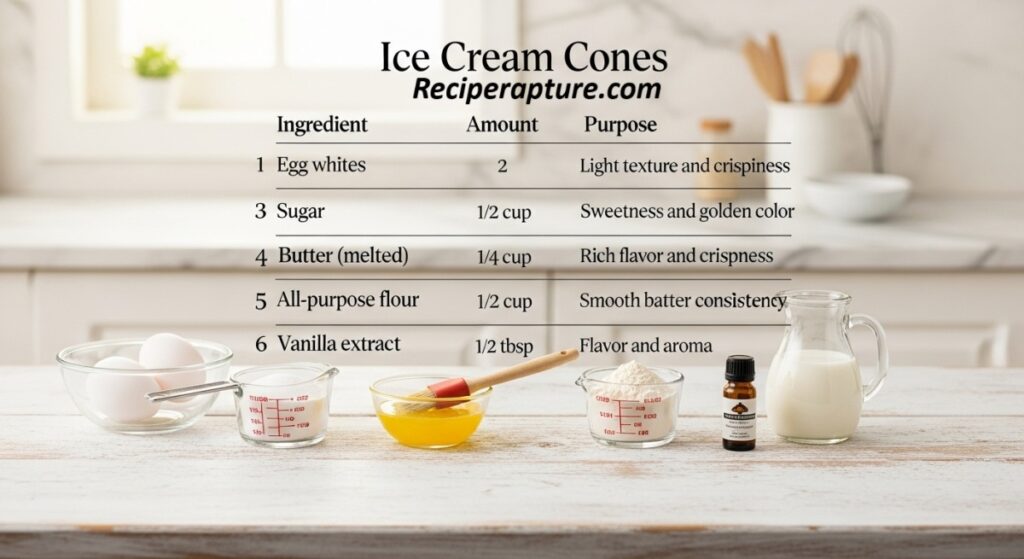
| Ingredient | Amount | Purpose |
| Egg whites | 2 | Light texture and crispiness |
| Sugar | ½ cup | Sweetness and golden color |
| Butter (melted) | ¼ cup | Rich flavor and crispness |
| All-purpose flour | ½ cup | Structure |
| Milk | 2 tbsp | Smooth batter consistency |
| Vanilla extract | ½ tsp | Flavor and aroma |
FAQ’s
Q: Can I make these cones without a waffle maker?
Yes! A non-stick skillet or flat griddle works perfectly.
Q: Why did my cones turn soft instead of crispy?
They need to cook longer or cool fully before storing.
Q: How do I store homemade cones?
Keep them in an airtight jar with silica gel or paper towel to absorb moisture.
Q: Can I use whole eggs instead of just egg whites?
It’s possible, but the cones will be softer and less crisp.
Q: Can I make chocolate cones?
Yes! Replace 1 tbsp flour with cocoa powder.
Nutritional Info (Per Cone – Approx.)
Calories: 110 kcal
Carbs: 15 g
Protein: 2 g
Fat: 5 g
Sugar: 8 g
Fiber: 0.5 g
Closing / Call-to-Action
Now that you know how to make crispy, golden cones ice cream at home, skip the store-bought ones and impress everyone with your homemade touch! Experiment with flavors, decorations, and shapes—every scoop deserves a cone that’s as special as your ice cream.
Conclusion
Making ice cream cones at home is easy, fun, and deeply satisfying. With a handful of ingredients and a few minutes, you can create light, crispy cones that elevate any dessert. Whether you’re making them for a summer party or a cozy night in, this recipe guarantees delicious results every time.